
Al completar el prólogo de Outriders , podrás elegir una de las cuatro clases. Debes elegir con cuidado: tu clase es permanente. En la siguiente guía, desglosamos los beneficios y desventajas de las cuatro clases diferentes de Outriders (Devastator, Trickster, Pyromancer y Technomancer) para que puedas decidir más fácilmente cuál es la adecuada para ti.
Cuando termines el prólogo y los primeros capítulos de Outriders, probablemente habrás desbloqueado las primeras cuatro habilidades de cada clase, lo que te dará una idea bastante clara de cómo se juegan todas. Si bien las cuatro clases están orientadas a luchar con agresión, se diferencian principalmente en el estilo de juego y en cómo pueden curarse.
Tabla de contenidos [ ocultar ]
- Devastator – Clase de tanque
- Tramposo – Clase pícaro
- Piromante – Clase lanzador de conjuros
- Tecnomante – Clase de apoyo
Devastator – Clase de tanque
El Devastator controla la gravedad, destrozando la tierra a su alrededor como medio de protección y ofensiva. Esta clase sobresale en el fragor de la batalla y sus habilidades le permiten recibir bastante castigo antes de caer, poseyendo un aumento del 15% en la salud máxima y un aumento del 30% en la armadura. Si normalmente desempeñas el papel de tanque en tu grupo de amigos, el Devastator es para ti.
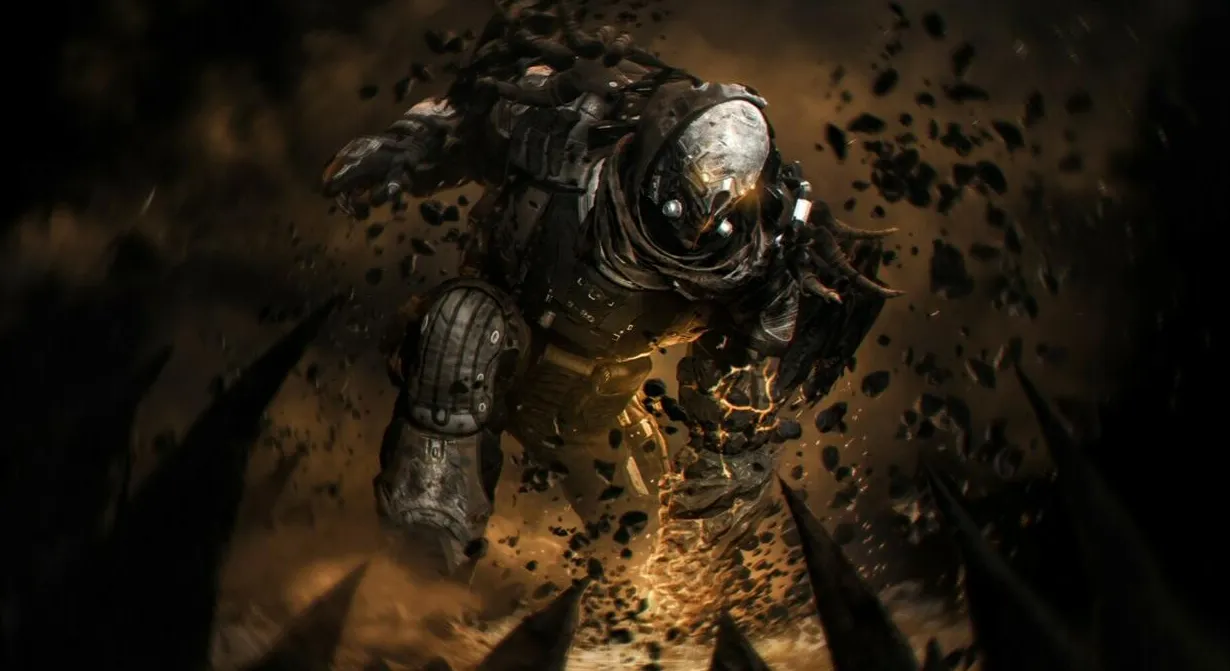
Las primeras cuatro habilidades del Devastator son Terremoto, Golem, Salto de gravedad y Reflejo de balas. Tus dos habilidades ofensivas, Terremoto y Salto de gravedad, causan cantidades devastadoras de daño: la primera envía una onda de choque lineal mientras que la segunda te ve volar en el aire para seleccionar un objetivo contra el que lanzarte como un meteoro asesino. En ambos casos, estás causando mucho daño en el área de efecto y entrando directamente en el meollo de las cosas, donde sobresale el Devastator. Habilidades como Golem y Reflect Bullets garantizan que sobrevivirás a tus constantes cargas en la batalla. Golem levanta la tierra a tu alrededor para que actúe como un caparazón protector, mientras que Reflect Bullets te permite atrapar proyectiles en el aire y enviarlos volando hacia los tontos que intentaron dispararte.
Choosing to go with Devastator means you’ll be forgoing long-range weaponry. Devastators excel with shotguns, assault rifles, and light machine guns. Putting points into the Vanquisher skill tree will boost your effectiveness with these firearms. If you prefer to become the ultimate tank that soaks up damage like it’s nothing, invest in the Warden tree. Seismic Shifter is the tree that’s most ideal for those looking to use the Devastator’s abilities more offensively and more often.
As a final note, every close range kill heals the Devastator by 24% of their maximum health (meaning you will have a higher chance of dying if you choose to run from a fight than stubbornly pushing towards it), and the class’ unique melee attack sends out a shockwave that causes targets to bleed and take damage over time. All in all, the Devastator is a pretty simple and easy class to use, regardless of whether you’re playing through the game on solo or in a team.
Trickster – Rogue Class
If wielding gravity as a weapon isn’t your speed, then perhaps the Trickster and their command of time and space will be more appealing. This fragile but powerful class is Outriders’ take on the traditional rogue role, specializing in hit-and-run tactics. To help alleviate the pain, the Trickster gets a 5% increase to maximum health and 5% damage mitigation to shields. It’s honestly not much–if you go with this class, you’ll have to constantly be on the move and rolling out of the way of attacks. Sitting still for any moment will likely lead to death.

The Trickster’s first four abilities are Temporal Blade, Slow Trap, Hunt the Prey, and Twisted Rounds. As the Trickster is all about outmaneuvering enemies, you’ll likely always want Temporal Blade or Slow Trap (or both) equipped. Temporal Blade paralyzes and damages all enemies immediately in front of you, giving you time to roll out of harm’s way and reload. Slow Trap erects a small bubble that slows down all enemies and their projectiles inside it for 10 seconds, allowing you to more easily dodge melee swings and bullets. Hunt the Prey is a great ability for starting a fight or getting out of one, teleporting you behind an enemy and buffing your shields. Twisted Rounds is a straight damage buff, increasing the power of your gun’s bullets until you switch firearms or reload.
Because of how fragile the Trickster is, you’ll always want to be running, rolling, and shooting in quick bursts. This makes weapons like shotguns (especially auto shotguns), pistols, and submachine guns all effective choices. Master of Space is the skill tree you want if you wish to get greater use out of these firearms, though Harbinger is also a great choice–this tree will buff your health and survivability, large benefits for the Trickster. However, if you’re confident enough in your dodging skills, then put points into Assassin, a tree which will greatly boost your abilities.
Like the Devastator, the Trickster heals by killing at close range, though it only gets a boost of 20% of its maximum health per kill instead of 25%. To make up the difference, close range kills also grant 12% of your shield. If you’re in trouble and your abilities are on cooldown, remember to melee–the Trickster’s unique close-range attack will temporarily slow down the time of a target, giving you ample chance to escape or reload. The Trickster is also not a very difficult class to master, though its low survivability does mean that it will be much easier to use as part of a team than on your own.
Pyromancer – Spellcaster Class
The Pyromancer commands fire, existing as Outriders’ resident spellcaster. Like the Trickster, the Pyromancer is a fragile class. However, instead of mitigating that disadvantage with speed, it excels in outright firepower. In terms of just dealing damage with abilities, the Pyromancer is at the top of all four classes, getting a 10% boost to ability damage on top of its impressive repertoire of fiery moves.

The first four abilities for the Pyromancer are Heatwave, Feed the Flames, Thermal Bomb, and Overheat. As a mid-range class that doesn’t do very well at long-range and can get easily overwhelmed at close-range, having Heatwave or Feed the Flames (or both) will keep you alive. The first sends out a wave of flame that can stall approaching enemies, while the second pulls enemies in and suffocates them into place. Between the two, you’ll be able to keep targets in that ideal sweet spot where your other abilities can deal the most damage. Thermal Bomb is great–it deals a lot of damage, and if the target is killed within a few seconds, they’ll explode and do tons of damage to everything around them. If you’d rather share the pain, Overheat affects all enemies within a set radius, though it only does minor damage.
The Pyromancer is a bit of an outlier among the four classes. While the other three are all about using specific firearms and then amplifying their combat effectiveness with abilities, the Pyromancer is all about using abilities first and foremost. That said, guns are a good way to mop up stragglers you don’t manage to burn alive–consider using assault rifles and/or sniper rifles. In an ideal scenario, your enemies should never manage to get in close enough that you’d need something like a shotgun. If they ever do, that’s what your sidearm (or fire-based melee attack that burns enemies) is for. That said, you can invest in the Ruler of Ashes skill tree to improve the Pyromancer’s skills with firearms. Scorcher and Tempest may be better trees to invest in though, especially the latter, which includes the skill Phoenix Nestling, allowing you to rise from the dead upon being killed–an excellent boon to have for such a fragile class.
For lack of a better term, choosing to go with the Pyromancer is a slow burn. It’s a weak class at first, but it can quickly grow more powerful over time if you learn how to effectively use its abilities. Whenever the Pyromancer hits an enemy with an ability, the enemy becomes marked. Marks only remain for 15 seconds; if the enemy dies (either by falling victim to you or to an ally) while marked, you’re healed by 24% of your maximum Health. This means you can’t just kill targets to get your health back like the Devastator or Trickster–you need to be strategic and try to only kill enemies after you’ve marked them. This makes the Pyromancer rather tough to use until you’ve unlocked several abilities, especially if you’re playing solo. If you’re willing to endure the learning curve until you unlock more abilities and master the necessary skills for keeping enemies not too close and not too far, it’s a powerful class. But maybe only go for Pyromancer if you’re experienced with shooters or you’re planning to play through Outriders with friends.
Technomancer – Support Class
Technomancers pull together pieces of discarded and broken technology to form powerful gadgets like turrets, rocket launchers, and landmines. As most of their constructs are stationary, Technomancers need to always have a good view of the battlefield so they know where to best place and aim their abilities. This means that Technomancers excel at long-range. This class recovers a portion of its health simply by dealing damage, and the amount of damage it deals with its abilities and long-range firearms is amplified by 15%. If you’re more of a lone wolf that enjoys sniping targets from afar or supporting your teammates from a distance, then the Technomancer is for you.
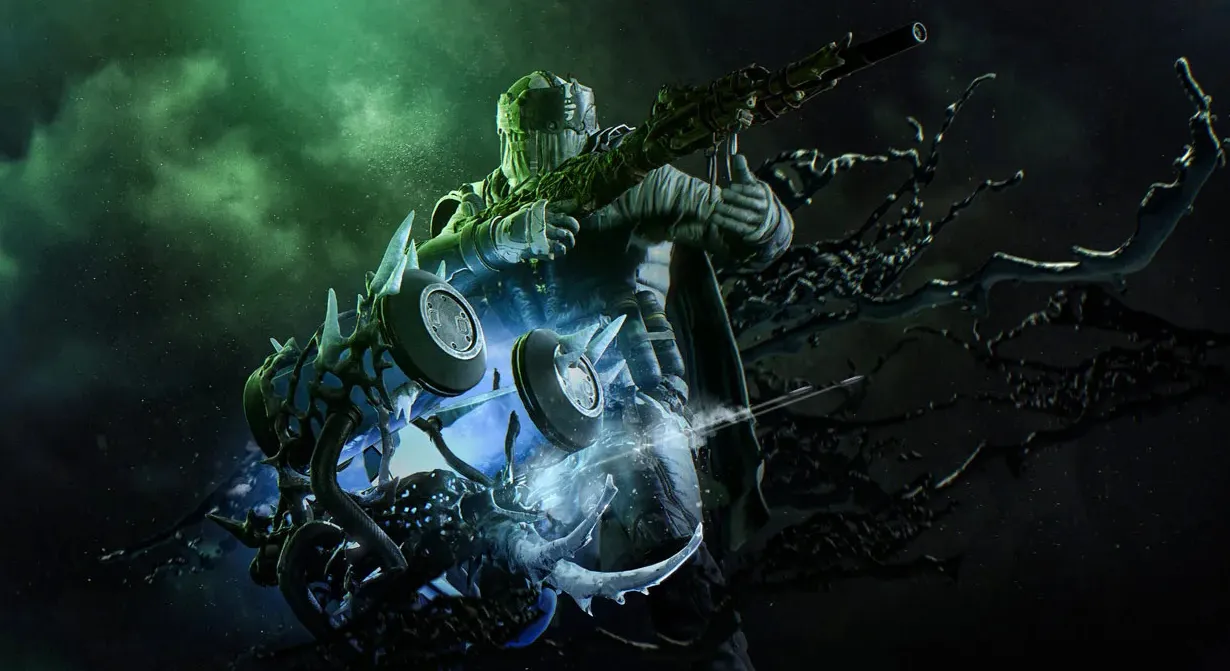
The Technomancer’s first four abilities are Scrapnel, Cryo Turret, Pain Launcher, and Blighted Rounds. The first three abilities all serve the same purpose: keeping enemies off you while repositioning yourself to a new sniper perch. Scrapnel sees you throw out a proximity mine that deals explosive damage; Cryo Turret places an automated turret that deals damage and freezes enemies in place if they get too close; and Pain Launcher puts down a turret that fires a bunch of missiles in a straight line before falling apart. Similar to the Trickster’s Twisted Rounds, the Technomancer’s Blighted Rounds buff a gun until you switch it out or reload. However, instead of increased damage, Blighted Rounds add a poison buff to your bullets that inflict toxic on a target–toxic will slowly damage an enemy over time and will poison other enemies if they get too close.
Sniper rifles are your friend if you go with the Technomancer. Rely on your abilities (or your icy melee attack) to slow enemies down so that you can create some distance and then murder from afar. High-accuracy assault rifles can be helpful if you want something that shoots a little bit faster for when enemies begin to crowd you, but ideally, careful ability management should ensure it never has to come to that. The Pestilence skill tree will boost your effectiveness with long-range weapons, even decreasing the distance for an attack to count as long-range. If you want to take on a bit more of a summoner role, go with the Tech Shaman tree, which will increase the effectiveness of the turrets you build to help you fight. And if you’re looking for more of a middle ground between the two, then put points into the Demolisher tree.
The Technomancer is the hardest class to use, primarily because it’s geared more towards supporting other players. When you’re on your own, this puts you at a pretty severe disadvantage, especially within enclosed spaces where it’s more difficult to create room between you and a target. If you plan on going with Technomaner, be prepared to face a tough uphill battle in lots of fights. This, of course, doesn’t apply if you’re playing with a friend. With a partner or two, the Technomancer becomes one of the easier classes to play. While the Devastator or Trickster jump into the thick of things and the Pyromancer controls the flow of the battleground, the Technomancer can pick off stragglers from a distance or utilize its assortment of abilities to quickly aid an overwhelmed teammate. Plus, the Technomancer’s ability to freeze targets comes in clutch during harrowing moments, slowing down enemies long enough to revive downed allies, give teammates time to reload or recharge their abilities, or simply regroup after a failed assault.
Publicaciones Relacionadas:
- Misiones de Fortnite Sledgehammer: cómo derrotar al Boss Cube Monster, encontrar piezas de Cube Monster (1)
- Guía de reliquias de Riders Republic: cómo obtener todos los deportes secretos (1)
- Cómo desbloquear la hoz y el martillo en CoD: Black Ops Cold War y Warzone (1)
- Casas de jugadores de Forza Horizon 5: todas las ubicaciones, precios y ventajas (1)